
Fluid Power World Contributing Editor Josh Cosford gave a webinar presentation on Proper Hose Assembly Guidelines. The transcript has been divided into an 8-part blog post series. The following excerpt from that webinar transcript is the eighth and final part of the series.
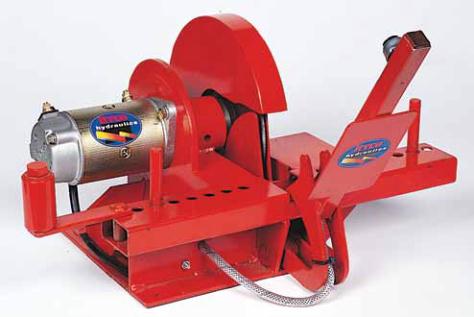
Specialized hose cutting saw
After the stamped acronym is taken care of, and it needs to be considered for every new application, what happens if you’re replacing an old hose? Don’t try to repair an old hose unless absolutely necessary, unless you need to do it in the field and you have the proper attachments and tools. Even still, it’s pretty sketchy. I wouldn’t trust it. It’s just not worth it. You could fix a hose, it might last you an hour. You’d fail again, next thing you know you’re dumping fluid all over the place. If you’re in farm equipment you could be dumping on your field. It’s always best to get things done right.
Also, follow the STAMPED protocol to ensure that correct replacement is made. All the criteria that you need to do is to make sure that you make a new hose should be done for a replacement hoses as well. When you are making a hose, whether it’s old or new, whatever your doing replacing or creating anew. Make sure that it’s cut correctly as well. Make sure you only use a specialized hose cutting saw. Most of these have a metal blade. The advantage of a metal blade is that it cuts clean and smoothly and it doesn’t leave fraying.
 Sometimes when you cut with a cut-off wheel the edges could be frayed. You see guys cut it with a hacksaw, that just can be a disaster. You’re not going to get the fitting on all the way. You have a good chance of it popping off again. Sometimes the fibers, the middle spirals or the braiding will bend backwards on itself. It would be very difficult to get the fitting on.
Also, ensure that you cut 90° across the hose; most of the machinery is made so that it does a good 90° cut. Specialized cut-off saws for hydraulic hose are good at that. They have some dies you put in place that as you push them across the middle of the cutter it automatically cuts them at 90°. This is important because if you have any kind of angular cut, it will bottom out sooner than it needs to be, so that the entire fitting isn’t inserted as deep as it needs to be inside the fitting, resulting in less area to grab on to and an inferior crimp.
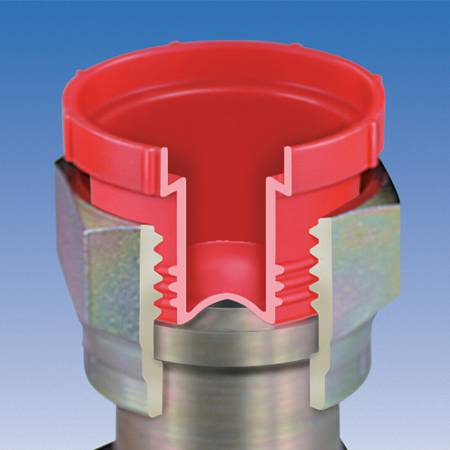
Cap hose ends immediately after cleaning to prevent environmental contamination.
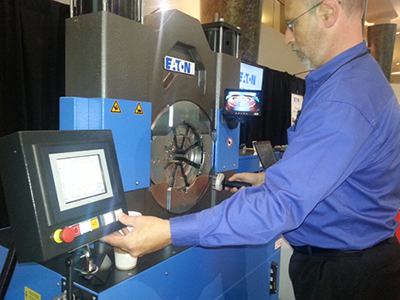
Make sure you crimp it to the specifications that are spelled out by the hose and fitting manufacturer. Make sure you measure it correctly. Once again, those will all be spelled out in the catalog of the manufacturer. If you’re a particular company using three or four different types of hose and fittings. just make sure you have those posted somewhere near your crimper and everybody’s trained properly on how to use that machinery. You want to make sure you have a nice good clean hose in the end.
Also consider how to clean the hose assembly. There’s really only one way to do this as far as I know. I’ve seen people just try to pass air through them, but that doesn’t always get everything out. Only use approved hose cleaning apparatus. Also, immediately cap the hose ends to protect them from environmental contamination. Any hose shop or any hydraulic shop can be pretty dirty places all to themselves. You want to make sure you cap them right away so that any ambient dirt, dust, whatever, doesn’t get inside the hose and eventually get inside your hydraulic system and damage your components.
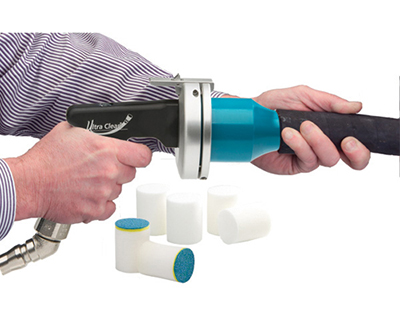 Everybody’s probably seen this type of hose cleaning machinery from Ultra Clean Technologies. They send a foam pellet through the hose to clean any debris, anything from the cutting, could be metal debris from the wire that’s introduced into the hose, it could be the particles of dust and whatever existed when they manufactured the hose itself.
These are all things that you want to get out. The pellet itself is a smaller diameter than the hose, but the air pressure is always more than enough to shoot it all the way through. As it goes through the hose, the pellet picks up particles, cleaning the hose.
As mentioned earlier, after you clean the hose assembly, make sure you cap it. This prevents contamination, especially if you do hundreds of thousands of hose assemblies that will be sitting around for a while. It’s just good practice, especially with the strict cleanliness code that you can get with some hydraulics machinery. And that concludes our 8-part blog series on Proper Hose Assembly Guidelines.
As it goes through the hose, the foam pellet picks up particles, cleaning the hose.
Use the following links to read parts 1-7:
Proper Hose Assembly Guidelines, Part 7 – Crimping
Proper Hose Assembly Guidelines, Part 6 – End Selection
Proper Hose Assembly Guidelines, Part 5 – Importance of Pressure
Proper Hose Assembly Guidelines, Part 4 – Application Considerations
Proper Hose Assembly Guidelines, Part 3 – Effects of Temperature
Proper Hose Assembly Guidelines, Part 2 – STAMPED
Proper Hose Assembly Guidelines – Introduction
The post Proper Hose Assembly Guidelines, Part 8 – Putting it All Together appeared first on Hose Assembly Tips.
Filed Under: Hose & Tubing, Hose Assembly Tips